Host a FastAPI Application Without a Server
Updated on Nov 2, 2024 · 8 mins read
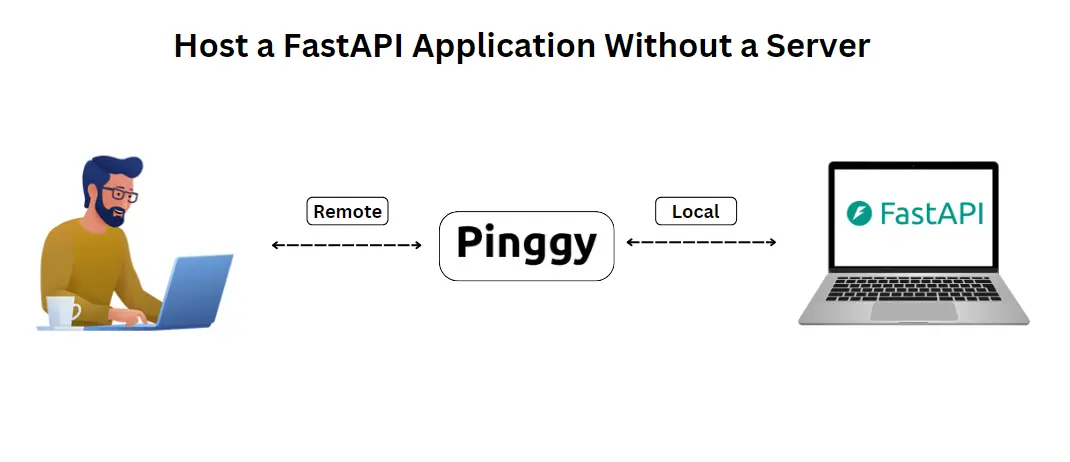
FastAPI, true to its name, is among the fastest frameworks for building APIs. It is a go-to choice for developers aiming to create APIs with speed and ease. Traditionally, hosting and sharing a FastAPI server involves setting up cloud environments, which can be time-consuming. In this article we’ll demonstrate how to bypass that complexity and instantly share your FastAPI server from localhost with a single command using Pinggy.

Summary
-
Step 1. Install python packages. Run these commands on your terminal:
python -m venv .venv source .venv/bin/activate python -m pip install --upgrade pip pip install "fastapi[standard]" -
Step 2. Write a simple FastAPI application. Create a
main.pyfile with the following code:from fastapi import FastAPI app = FastAPI() @app.get("/") async def root(): return {"message": "Hello World"} -
Step 3. Run this command to get a public URL to your FastAPI:
ssh -p 443 -R0:localhost:8000 qr@a.pinggy.ioYou will get a URL and port in the output such as:
https://rnas-12-43-32-5.a.pinggy.linkNow you can access your FastAPI application from anywhere.
Introduction to FastAPI
FastAPI is a modern, high-performance web framework for building APIs with Python, based on standard Python type hints. It’s known for its speed, ease of use, and automatic documentation generation with OpenAPI. Built on ASGI (Asynchronous Server Gateway Interface), FastAPI is especially suited for handling concurrent requests and is often used to create RESTful APIs for web applications, mobile backends, and even IoT solutions.
Key Features of FastAPI
- FastAPI is comparable in speed to Node.js and Go, making it ideal for building high-performance applications.
- It offers an excellent developer experience, with features such as input validation and detailed error handling to simplify development.
- FastAPI automatically generates OpenAPI and Swagger UI documentation, ensuring that your APIs are well-documented with minimal effort.
- Built on the Starlette and Pydantic libraries, FastAPI is highly compatible with a wide range of Python libraries.
Now that we know the basics of FastAPI, let’s look at how to install it and test it without needing a traditional server.
Running a FastAPI server on localhost
Step 1: Create a Virtual Environment
When you work in Python projects you should use a virtual environment (or a similar mechanism) to isolate the packages you install for each project.
To create a virtual environment, you can use the venv module that comes with Python.
python -m venv .venv
Note: If the command
pythondoes not work, try replacing it withpython3
That command creates a new virtual environment in a directory called .venv.
Step 2: Activate the Virtual Environment
Activate the new virtual environment so that any Python command you run or package you install uses it.
For Linux, MacOS
source .venv/bin/activate
For Windows Powershell
.venv\Scripts\Activate.ps1
For Windows Bash
source .venv/Scripts/activate
Upgrading pip before installing packages like FastAPI is generally a good practice, especially if you’re working in a new environment or haven’t updated pip in a while.
To upgrade pip, use:
python -m pip install --upgrade pip
Step 3: Building a Simple FastAPI Application
The simplest FastAPI file could look like this:
from fastapi import FastAPI
app = FastAPI()

@app.get("/")
async def root():
   return {"message": "Hello World"}
Step 4: Install FastAPI
To get started with FastAPI, you need to install it.
To install FastAPI along with some optional dependencies, Use the command:
pip install "fastapi[standard]"
Step 5: Run the FastAPI Application
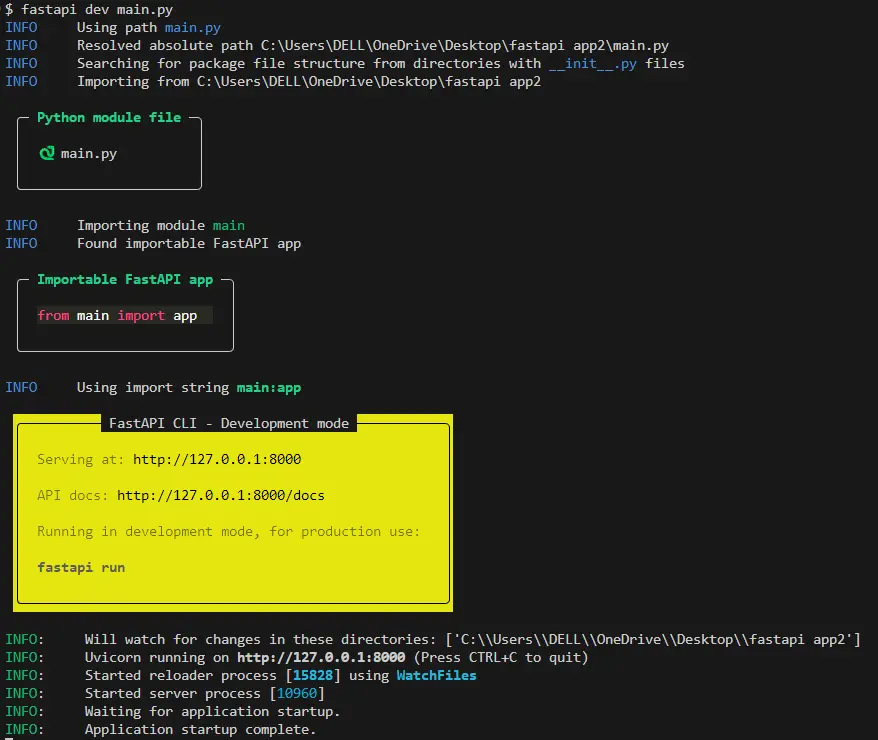
Now, you can run the application with:
fastapi dev main.py

Step 6: Check the output
Open your browser at http://127.0.0.1:8000
You will see the JSON response as:
{"message": "Hello World"}

Hosting FastAPI through Pinggy
Pinggy offers an easy and secure way to expose a local FastAPI application to the internet without needing complex server setups or cloud deployments.
Use the following command to set up a tunnel to your local development server:
ssh -p 443 -R0:localhost:8000 qr@a.pinggy.io
Note: Replace the port 8000 in the command with the port where your local development server is running.
After running the command, Pinggy will generate a public URL which might looks like this:
http://rnssh-103-171-246-33.a.free.pinggy.link

When you paste the modified URL into your browser, your FastAPI application will process the request and return the output in JSON format, which will be displayed directly in the browser.
Advantages of Using Pinggy for Hosting FastAPI
Pinggy provides several unique benefits for developers:
- Quick Setup: Instantly expose a local FastAPI app to the internet without configuring cloud infrastructure or deploying a server.
- Testing and Demos: Ideal for sharing applications during development or conducting live demos. It simplifies the process of testing integrations with external services that require a public URL (e.g., webhooks, payment gateways).
- Flexible Access: With Pinggy’s public URL, you can let others access your local application without being on the same network.
- Security Built-In: Pinggy supports HTTPS by default, which helps secure the connection between clients and your local application.
- Developer-Friendly: Pinggy is straightforward and doesn’t require heavy configurations, making it accessible for both new and experienced developers.
ASGI Servers and Their Role in FastAPI Applications
FastAPI is an ASGI web framework.
ASGI (Asynchronous Server Gateway Interface) servers are essential for running FastAPI applications as they are optimized for handling asynchronous communication. ASGI, an evolution of the WSGI (Web Server Gateway Interface)standard, is specifically designed to manage high-traffic environments, real-time data, and WebSocket connections. Below is an overview of several ASGI servers, detailing their key features and common use cases for FastAPI applications.
Uvicorn
Uvicorn serves as a popular choice for running FastAPI due to its simplicity and speed. It supports HTTP, WebSocket, and HTTP/2 protocols. Known for its low latency and high concurrency, Uvicorn is highly compatible with FastAPI, making it well-suited for both development and production environments that handle real-time data or asynchronous processes.
Command to Start:
uvicorn main:app --host <ip-address> --port 8000
Hypercorn
Hypercorn offers versatility with support for HTTP, HTTP/2, and advanced protocols like QUIC. It can operate in both synchronous and asynchronous modes, providing flexibility for applications with diverse protocol requirements. This makes Hypercorn ideal for complex architectures, such as microservices, that involve a mix of synchronous and asynchronous operations.
Command to Start:
hypercorn main:app --bind <ip-address>:8000
Daphne
Daphne was initially developed for Django Channels and is particularly well-suited for projects that prioritize real-time data transfer, especially involving WebSocket connections. This makes Daphne ideal for applications like chat systems, live analytics, and collaborative tools where asynchronous communication is essential.
Command to Start:
daphne -b <ip-address> -p 8000 main:app
Hybrid Approach
Some developers choose a hybrid approach, utilizing Uvicorn for HTTP routes and Daphne for WebSocket connections by leveraging ASGI Lifespan middleware or load balancers. This method effectively combines Uvicorn’s speed in handling HTTP requests with Daphne’s optimized management of WebSocket connections, offering a tailored solution for applications that require both fast HTTP responses and efficient WebSocket handling.
While these servers each provide distinct advantages, Pinggy complements these setups by making FastAPI applications accessible on the internet effortlessly, allowing developers to focus on application development rather than server configuration.
Using Pinggy to share the ASGI server
After installing FastAPI , We need to install Uvicorn.
pip install uvicorn
Run the below command to run the application in your localhost using uvicorn server:
uvicorn main:app --host localhost --port 8080
Share the server using Pinggy
Pinggy offers the easiest way to expose a local ASGI application to the internet without needing complex server setups or cloud deployments.
Use the following command to set up a tunnel to your local development server:
ssh -p 443 -R0:localhost:8000 qr@a.pinggy.io
Note: Replace the port 8000 in the command with the port where your ASGI server is running.
After running the command, Pinggy will generate a public URL which might looks like this:
http://rnssh-103-171-246-33.a.free.pinggy.link
When you paste the modified URL into your browser, your ASGI server will process the requests through FastAPI application, and return the output in JSON format, which will be displayed directly in the browser.
Conclusion
In this article, we explored how to host a FastAPI application without a traditional server using Pinggy. FastAPI is an efficient framework for creating high-performance APIs, known for its ease of use and automatic documentation. We demonstrated the installation process, built a simple FastAPI application, and discussed how to make it publicly accessible via Pinggy. Additionally, we highlighted various ASGI servers, such as Uvicorn, Hypercorn, and Daphne, which are essential for running FastAPI applications efficiently, particularly in handling asynchronous communication.
Overall, combining FastAPI with Pinggy and the right ASGI server provides a quick and effective solution for deploying APIs.